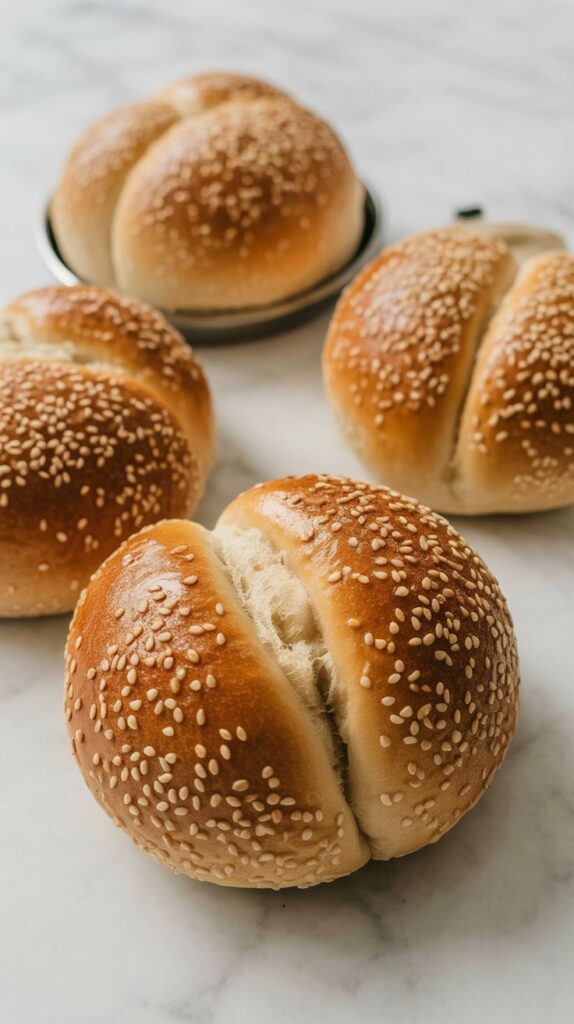
If you’ve never made your own hamburger buns at home, let me just say—once you do, there’s no going back to the bagged ones. These sourdough buns are soft, slightly chewy, and have that perfect golden top that holds up to juicy patties, melty cheese, and all the good stuff. The best part? You can start in the morning and have them ready for dinner. It’s a simple, slow-rise kind of recipe that fits right into a cozy home cooking day.
I first started baking buns like these during the summer when we were grilling out a lot. One day, I ran out of store-bought buns and decided to use some of my active sourdough starter instead—and I’ve never looked back. They’ve now become a burger night ritual in our house.
This batch makes 6 buns, and if you’re in a hot dog kind of mood, you can shape the dough differently and make hot dog buns instead.
A Real-Life Baking Schedule That Works
If you’re planning your day around these buns, here’s the timeline I usually follow. My kitchen sits around 72°F (22°C), so if it’s warmer or cooler where you are, things may move faster or slower. Just trust your dough—it tells you when it’s ready.
The Night Before:
- 8:00 PM: Feed your sourdough starter so it’s bubbly and ready to go by morning.
The Next Morning:
- 8:00 AM: Mix up the dough.
- 8:30 AM: First stretch and fold.
- 9:00 AM: Second stretch and fold.
- 9:30 AM: Third stretch and fold. Then cover and let it rise until doubled.
- 3:30 PM: Divide and shape the dough.
- 5:00 PM: Bake time! Egg wash, top with sesame seeds, and pop in the oven.
What You’ll Need
Here’s what goes into the dough—and a few notes from my own kitchen:
- All-purpose flour – I use regular AP flour, but if you want a heartier flavor, you can swap up to 25% with whole wheat. Just know you’ll need to bump up the water a little. I usually start with 25g and add a touch more if needed.
- Sugar – Honey or maple syrup work too. I often use honey when I want a slightly richer, warm sweetness.
- Salt
- Water
- Active sourdough starter – Well-fed and bubbly.
- Egg – For the egg wash. It gives the buns that lovely shine.
- Sesame seeds – Optional, but I highly recommend them. They just give that classic burger look and a bit of nutty crunch.

Let’s Make the Dough
The Night Before – Feed Your Starter
Around 8 PM, I take a little unfed starter from the fridge and feed it with flour and water to get it going. I usually mix it right in a small bowl or jar so it’s ready to dump into the dough bowl in the morning.
Morning – Mix the Dough
At 8 AM, combine your flour, sugar, salt, water, and active starter in a large bowl. The dough will look a bit rough and shaggy at first—don’t stress. Just give it a mix with your hand or a spoon, cover it, and let it rest for 30 minutes. This rest helps the flour soak up the water and makes the dough easier to handle.
Stretch and Folds
Now we’re going to give our dough some love to build strength.
- 8:30 AM: Grab one edge of the dough, stretch it up, and fold it over. Rotate the bowl and do it on all sides. Then cover.
- 9:00 AM & 9:30 AM: Repeat the same process two more times.
After the last fold, cover the bowl and let the dough rest and rise. In my kitchen, this takes around 6 hours. You want it to double in size and look pillowy.
Time to Shape the Buns
At around 3:30 PM, the dough should be airy and soft. Here’s where it gets a bit sticky—literally. Sourdough dough is more hydrated than regular yeasted dough, so don’t panic if it feels loose.
Turn it out onto a well-floured surface. I use a bench scraper to portion it into 6 equal pieces—around 112–115g each.
To shape, I take one piece, stretch a corner and fold it into the center, working around the dough like I’m closing a little parcel. Then I flip it seam-side down and gently twist it into a tight ball with my hands cupping the bottom.
Transfer the shaped buns to a parchment-lined baking sheet, cover with a clean towel, and let them puff up for another 1–2 hours.

Bake Till Golden and Gorgeous
Right before baking, I beat an egg with a bit of water and brush each bun for that glossy finish. Sprinkle on sesame seeds—sometimes I do half with sesame and half plain for variety.
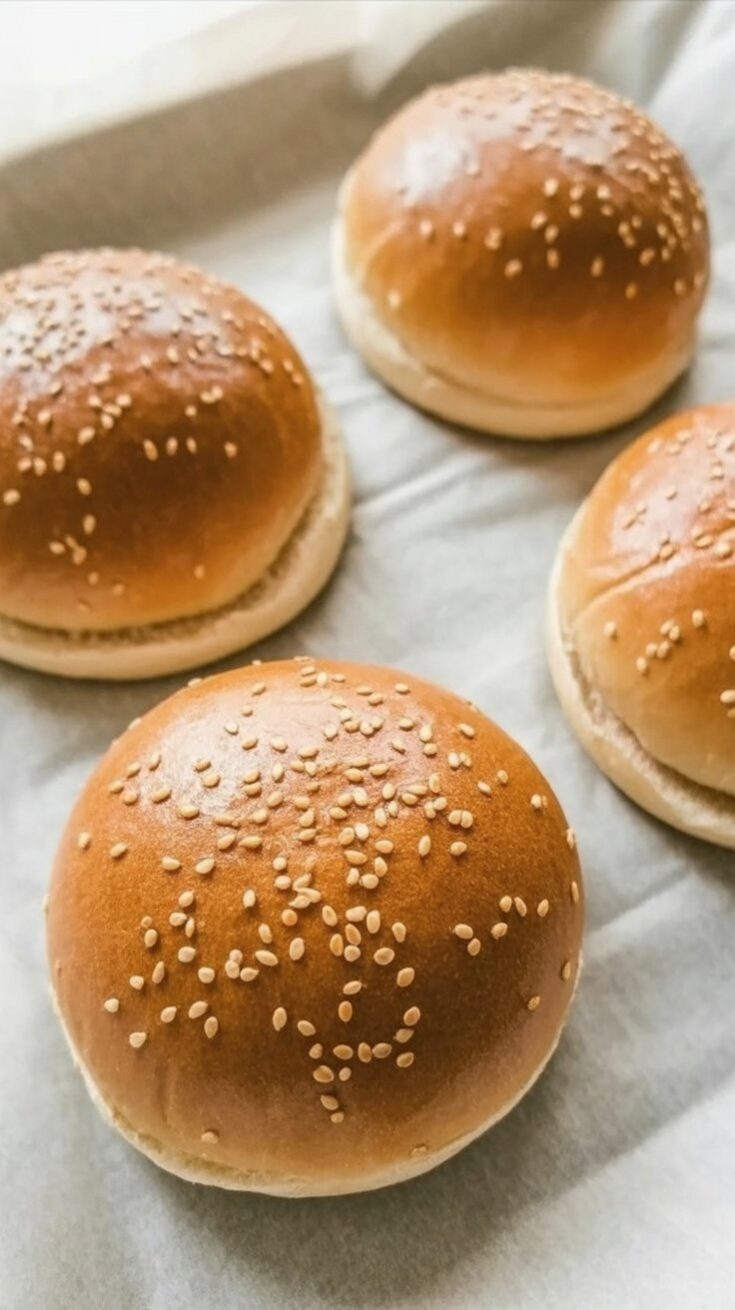
Bake in a preheated oven at 375°F (190°C) for about 25 minutes, or until the tops are golden brown. The smell at this point? Pure bakery bliss.
Let the buns cool on a wire rack before slicing. Resist the urge to cut too early—steam needs to escape, or the inside will get gummy.
Sourdough Hamburger Buns
These homemade sourdough hamburger buns are wonderfully soft, subtly tangy, and make any burger feel extra special. With just a few pantry staples and a bit of time, you can have these fresh, pillowy buns ready for dinner the same day. Perfect for everything from classic cheeseburgers to veggie-packed patties.
Ingredients
- To Make ¼ Cup Active Starter (50g):
- 2 tsp sourdough discard
- 3 tbsp all-purpose flour
- 5 tsp water
For the Dough:
- 1 cup water (240g)
- 1½ tbsp honey (30g)
- 1¼ tsp fine sea salt (10g)
- ¼ cup active sourdough starter (50g)
- 3 cups all-purpose flour (360g)
For Topping:
- 1 egg
- 1 tbsp water
- Sesame seeds (optional)
Instructions
- Build Your Active Starter: About 12 hours before you plan to mix the dough, stir together sourdough discard, flour, and water in a clean jar. Loosely cover and leave it at room temperature. Once it’s doubled in size and bubbly, it’s ready to use. This will make a bit more than needed to account for what clings to the jar.
- Mix the Dough: In a large bowl, combine water, honey, active starter, flour, and salt. Stir until you don’t see any dry patches. The dough will look rough at this stage—don’t worry. Cover and let it rest for about 30 minutes.
- Strengthen the Dough (Stretch & Fold or Mixer)Lightly wet your hands and give the dough a round of stretch and folds—lifting from one edge, stretching it up, and folding it over itself. Turn the bowl as you go until you complete a full circle. Cover and let rest again for 30 minutes. Repeat this two more times.If using a stand mixer, attach the dough hook and mix on speed 3 for 8–10 minutes until smooth and elastic.
- Bulk Fermentation: Cover the bowl and let the dough rise in a warm place until it’s doubled. This usually takes about 6 hours at 72°F (22°C).At this point, you can refrigerate the dough for up to 2 days if you’re not baking right away. If chilling, be prepared for a longer second rise.
- Shape the Buns: Turn the dough out onto a lightly floured surface. Divide it into 6 equal pieces (around 112–115g each). Gently shape each into a ball by folding the edges into the center and then rolling it seam-side down.
- Final Proof: Arrange the shaped dough balls on a parchment-lined baking sheet. Dust lightly with flour, cover with a clean towel, and let them rise at room temperature for 1 to 2 hours until they look puffy and airy.
- Bake: Preheat your oven to 375°F (190°C). Beat the egg with a tablespoon of water and brush the tops of the buns. Add sesame seeds if using. Bake for 25–30 minutes, or until beautifully golden on top.
- Let them cool completely before slicing. Trust me—they're worth the wait
Notes
- If you've refrigerated the dough after the first rise, allow extra time for the second rise. Cold dough takes longer to proof, but the flavor payoff is often even better.
Nutrition Information
Yield
6Serving Size
1Amount Per Serving Calories 315Total Fat 4gSaturated Fat 1gTrans Fat 0gUnsaturated Fat 3gCholesterol 31mgSodium 502mgCarbohydrates 60gFiber 3gSugar 5gProtein 9g
All Chicken Recipes.com, occasionally offers nutritional information for recipes contained on this site. This information is provided as a courtesy and is an estimate only. This information comes from online calculators. Although allchickenrecipes.com attempts to provide accurate nutritional information, these figures are only estimates.
How I Store and Freeze These Buns
If you’re not using all six right away (though we usually do, thanks to leftover pulled pork or egg salad sandwiches the next day), here’s how I keep them fresh:
- On the counter: Store them in a zip-top bag or wrapped in a clean kitchen towel for up to 2 days.
- In the freezer: Once completely cooled, pop them into a freezer bag. They freeze well for up to a month. I take one out in the morning and let it thaw at room temperature. It’s just as soft and fresh.
Let me know if you give these sourdough buns a try—I honestly think they’re a home cook’s secret weapon for leveling up any burger night. Once you get the hang of shaping the dough, it becomes second nature.
If you’ve got extra starter hanging around, these are such a good way to put it to use. Way more rewarding than tossing it, and way tastier than anything off the shelf.
Try Other Hamburger Recipes: