If you’ve ever had Chicken Katsu in Japan or on a Hawaiian plate lunch, you know it’s more than just fried chicken—it’s crisp, juicy perfection. This homemade version nails that crunchy golden crust while keeping the chicken tender and moist inside. Best of all, you only need a few pantry staples and a hot pan of oil to make this restaurant-quality katsu right in your own kitchen.

What Is Chicken Katsu?
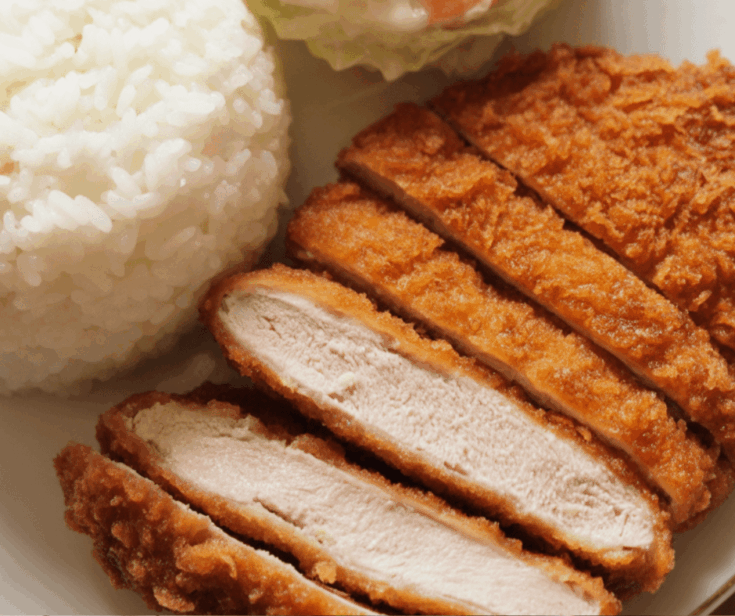
Chicken Katsu is a popular Japanese dish made from breaded, deep-fried chicken cutlets—usually served with white rice, shredded cabbage, and a sweet-savory tonkatsu sauce. It’s a beloved staple in Japanese cuisine and also found everywhere in Hawaii, often as part of a “plate lunch” with creamy mac salad on the side.
Why You’ll Love This Recipe
- Crispy outside, juicy inside: The double-layer of wet batter and panko creates unbeatable crunch while locking in moisture.
- Simple pantry ingredients: No special shopping trip needed—just chicken, panko, flour, egg, and a few seasonings.
- Versatile: Use it for Chicken Katsu Curry, sandwiches, rice bowls, or bento lunches.
- Make-ahead friendly: Stores well and reheats beautifully in an air fryer or oven.
Ingredients You’ll Need
- Chicken thighs: Boneless, skinless thighs work best for juicy, flavorful cutlets. Pound them to ½-inch thickness for even cooking.
- Salt and pepper: For seasoning the chicken before breading.
- Garlic powder: Adds a little extra depth to the batter.
- Egg and flour: Mixed together to create a wet batter that helps the breadcrumbs stick.
- Panko breadcrumbs: The key to that ultra-crispy, light coating.
- Neutral oil for frying: Avocado, canola, or vegetable oil are all great choices. Avoid olive oil.
Note: You can substitute chicken breast, pork chops (Pork Katsu), or even tenderized steak for variations.

Step-by-Step Instructions
1. Prep the Chicken
Use a meat mallet or rolling pin to pound chicken thighs to about ½-inch thickness. Season both sides generously with salt and pepper.
2. Make the Wet Batter
In a bowl, whisk together eggs, flour, garlic powder, salt, and pepper. The batter should be slightly thinner than pancake batter. If needed, add a splash of water to loosen it.
3. Bread the Chicken
Dip each piece of chicken into the batter, letting the excess drip off. Then press into a shallow dish filled with panko breadcrumbs, coating thoroughly. Make sure there are no bare spots.
4. Fry to Crispy Perfection
Heat about 1 inch of oil in a skillet to 350°F (180°C). Carefully lower the breaded chicken into the hot oil and fry for 4–6 minutes until golden brown and cooked through (internal temp should hit 165°F). Don’t overcrowd the pan—fry in batches if needed.
5. Drain and Rest
Transfer the fried cutlets to a wire rack or paper towel-lined plate to drain off any excess oil. Let rest a few minutes before slicing.
Tips for Crispy, Juicy Chicken Katsu
- Use panko breadcrumbs only. They create that signature crunch that regular breadcrumbs just can’t match.
- Keep the oil at a steady 350°F. Use a thermometer to monitor. If the oil gets too cool, your chicken will absorb too much oil; too hot, and the crust will burn before the inside cooks through.
- Let cutlets rest on a wire rack. This prevents them from getting soggy on the bottom.
- Pound the chicken evenly. Uneven thickness leads to uneven cooking. Aim for a consistent ½-inch.
Serving Suggestions
- Classic Plate Lunch Style: Serve sliced katsu with white rice, shredded cabbage, and tonkatsu sauce (store-bought like Bulldog, or homemade).
- Make it Chicken Katsu Curry: Pour Japanese curry over the sliced cutlet and rice—cozy and comforting.
- Tuck into a Sandwich: Slice it up and serve on a soft bun with lettuce, mayo, and a drizzle of sauce.
- Try it in a Bowl: Over rice with pickled vegetables and a runny egg.

Storing & Reheating
- Fridge: Store cooled katsu in an airtight container for up to 3 days.
- Air fryer: Reheat at 350°F for 8–10 minutes to get it crispy again.
- Oven: Bake at 400°F for about 15 minutes.
Chicken Katsu
Golden, crunchy on the outside, and juicy on the inside—this Chicken Katsu is the kind of comfort food that hits just right.
Ingredients
- 1 lb chicken thigh, boneless, skinless, pounded to 1/2" thick
- 2 eggs
- 1 teaspoon garlic powder
- 2 cups panko breadcrumbs
- 3 tablespoons all-purpose flour
- 1/2 teaspoon salt
- 1/2 teaspoon black pepper
- neutral oil, for frying
Instructions
- Start by pounding the chicken to an even 1/2-inch thickness and season both sides with salt and pepper.
- In a bowl, whisk together the eggs, flour, a little more salt and pepper, and garlic powder until smooth. You’re going for a loose batter—just a bit thinner than pancake batter. If it feels too thick, splash in a little water to loosen it up.
- Dip each piece of chicken into the batter, let the excess drip off, then press it into the panko until completely coated. Make sure you get every nook covered—no bare patches.
- Heat oil in a Dutch oven or deep pan to 350°F. Carefully lower the breaded chicken into the hot oil and fry for 4 to 6 minutes, or until golden brown and cooked through to 165°F inside. Let the cutlets rest on a wire rack to stay crispy.
- Slice it up, plate with a scoop of rice or a crisp salad, and dig in.
Notes
- Chicken options: Thighs are ideal for this recipe because they stay juicy and flavorful. You can use bone-in, skin-on thighs if that’s what you’ve got—just remove the bone and skin before starting. Chicken breast works too, but keep a close eye on the cooking time to avoid drying it out.
- Pounding matters: Use a rolling pin or meat mallet to even out the thickness. This helps it cook evenly and keeps the inside tender.
- Don’t skip seasoning: Salt and peppering the chicken before breading locks in flavor and helps the meat stay juicy. It’s a simple step that makes a big difference.
Nutrition Information
Yield
4Serving Size
1Amount Per Serving Calories 491Total Fat 18gSaturated Fat 4gTrans Fat 0gUnsaturated Fat 12gCholesterol 231mgSodium 897mgCarbohydrates 44gFiber 3gSugar 3gProtein 39g
All Chicken Recipes.com, occasionally offers nutritional information for recipes contained on this site. This information is provided as a courtesy and is an estimate only. This information comes from online calculators. Although allchickenrecipes.com attempts to provide accurate nutritional information, these figures are only estimates.