There’s nothing quite like the comfort of Southern fried chicken — that golden crunch on the outside, juicy and flavourful on the inside. But let’s be honest, the traditional method can take all day if you’re marinating it properly. That’s where the Instant Pot saves the day. I’ve been making fried chicken since my college days, but this shortcut has changed everything — without compromising flavour.
If you’re craving that soulful crispiness but don’t want to soak the chicken overnight or babysit the stove for hours, this method is a total weeknight win.
Why I Use the Instant Pot First (And You’ll Love It Too)
I used to be a fried chicken purist — you marinate in buttermilk overnight or it’s not happening. But a few years ago, I gave in to the pressure (literally) and tried tossing the chicken in the Instant Pot. The result? Shockingly tender meat with all the flavors soaked in… in just 20 minutes. No waiting around until tomorrow.
The trick is using the pressure cooker to tenderize and speed-marinate the chicken in buttermilk, then giving it a quick fry in oil to get that unbeatable crispy coating. You’re not skipping the crust — just cutting the prep time without cutting corners.
It’s perfect for when you want that Southern flavor but you’ve got a hungry crowd and not much time to spare.
Can You Really Fry in the Instant Pot?
Let me save you the trouble — don’t even try it. Yes, you can sauté in the Instant Pot, but when it comes to fried chicken, the result is always a little sad. The bottom crisps while the top steams and gets rubbery. I’ve tested it. It’s not worth it.
So here’s what works: use the Instant Pot for brining and tenderizing, and finish on the stovetop in a proper skillet. You get the best of both worlds — speed and that irresistible crunch.
How Long Should You Pressure Cook It?
10 minutes is all it takes to get that buttermilk magic working in the Instant Pot. Then let the pressure release naturally for another 10 minutes. That gentle cool-down helps the chicken absorb more flavor and come out extra juicy.
I remember the first time I tried this — I was skeptical. But after biting into that first piece, I was hooked. You still get that deep Southern flavor, without waiting 24 hours.
What You’ll Need
Here’s what goes into my Instant Pot Southern Fried Chicken. Nothing fancy — just tried-and-true ingredients that pack a punch of flavor.
- Chicken pieces (drumsticks, thighs, or a mix — bone-in is best)
- Buttermilk – this is the star. Don’t skip it. It tenderizes the meat like a dream.
- Salt – to season the brine
- Flour & your favorite seasoning mix – for dredging
- Oil – for frying on the stove (I use vegetable oil or peanut oil)
If you’re using store-bought seasoning blends, that’s totally fine. I sometimes go with a mix of paprika, garlic powder, cayenne, and a pinch of oregano — it’s simple and never fails.
How I Make It – Step by Step
This method is super approachable. Once you try it, I promise you’ll never want to wait overnight again.
- Start with the pressure cook
Add chicken, buttermilk, and salt to the Instant Pot. Pressure cook on high for 10 minutes. Let it release naturally for another 10. - Cool it down
Carefully take out the chicken and let it cool a bit. You want it firm enough to dredge. - Get that crispy coating
Toss the chicken in your flour and seasoning blend until it’s fully coated. Don’t be shy — this is what makes it crispy. - Fry it up
Heat oil in a skillet and fry the chicken until it’s golden and crispy on the outside. Since it’s already cooked through, you just need to crisp it up.
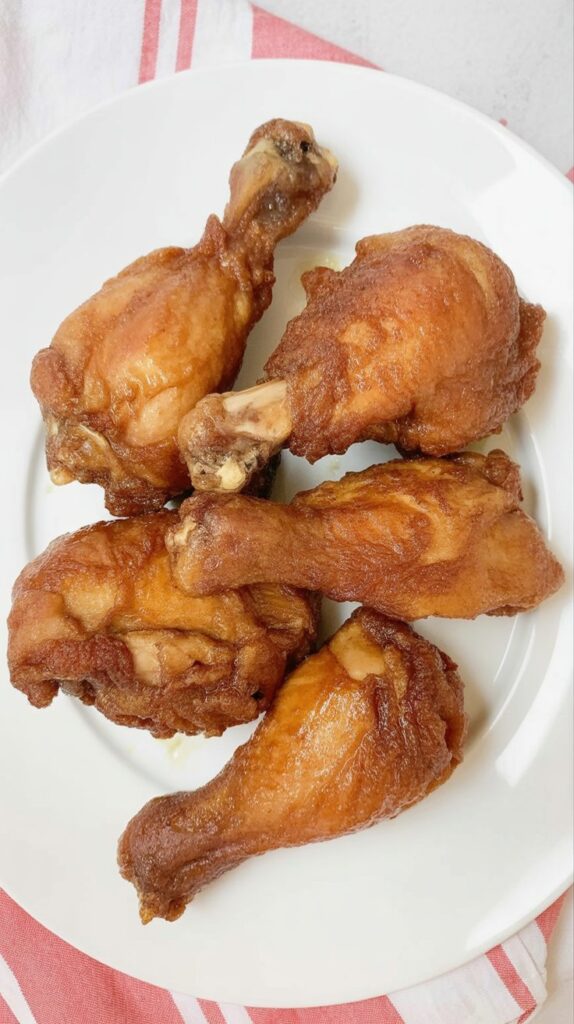
The end result? Tender, juicy chicken with a shatteringly crisp crust. My kitchen smells like Sunday at grandma’s house every time.
Favourite Sides to Make It a Meal
You know what goes perfectly with Southern fried chicken? All the comfort food fixings. I usually serve mine with:
- Creamy mashed potatoes and gravy
- Tangy coleslaw
- Biscuits or cornbread
- A big glass of sweet iced tea
Some nights, I’ll even do a quick mac and cheese or buttered corn on the side. It’s that kind of meal that brings everyone to the table fast.
Real-Life Cooking Tips
- Don’t skip cooling the chicken before dredging. If it’s too hot, the flour turns gummy and won’t crisp up properly.
- Use a thermometer when frying — around 350°F is your sweet spot.
- Double dredge if you love an extra-crunchy crust. Just dip the chicken in a bit of buttermilk again, then dredge it once more before frying.
- If you’re cooking for a big group, keep fried pieces warm in the oven at 200°F while you finish the batch.
Storage & Leftovers
Leftover fried chicken? Rare in my house — but if you’ve got some, here’s how to keep it tasty:
- Store in the fridge in an airtight container for up to 3 days.
- Reheat in the oven or air fryer to bring back the crisp. Avoid microwaving — it’ll go soggy fast.
- You can even chop up leftovers and add them to wraps or sandwiches the next day.

Common Questions (I Get These a Lot)
Can I use boneless chicken?
Sure, but you’ll need to reduce the pressure cook time to about 7 minutes. I personally love bone-in for the flavor and juiciness.
Can I use milk instead of buttermilk?
You can make a quick substitute by mixing regular milk with a splash of lemon juice or vinegar, but buttermilk gives the best results.
Is it spicy?
Only if you want it to be. Add cayenne to the flour for a kick — or leave it out for a more classic version.

Instant Pot Fried Chicken

There’s something comforting about good fried chicken, especially when it’s tender on the inside with that crispy golden crust on the outside. With the help of an Instant Pot, you can cut down the brining time while still soaking in all the flavor of traditional Southern-style fried chicken. This method locks in juicy goodness and gives you a head start before it hits the skillet.
Ingredients
For the Pressure Brine:
- 3 cups buttermilk (or 3 cups milk + 3 tbsp apple cider vinegar)
- 1 teaspoon salt
For the Chicken:
- 6–8 pieces of chicken (or 1 whole 3 lb chicken, cut up)
- ½ cup buttermilk (or ½ cup milk + ½ tbsp apple cider vinegar)
- 1 egg
- 48 oz peanut or vegetable oil (enough to fill skillet 1-inch deep)
For the Coating:
- 2 cups all-purpose flour, divided
- 1 ½ teaspoons garlic powder
- 1 ½ teaspoons onion powder
- 1 ½ teaspoons paprika
- ¾ teaspoon red pepper
- ¾ teaspoon black pepper
- 1 tablespoon poultry or all-purpose seasoning
- 1 ½ teaspoons salt
Instructions
- Pressure-Marinate the Chicken: Start by mixing up a quick buttermilk substitute if needed—combine milk with apple cider vinegar and let it sit for 5 minutes. Pour the buttermilk and salt into the Instant Pot, then nestle the chicken pieces in, skin side up. Secure the lid, set the valve to sealing, and pressure cook on high for 10 minutes. Once the time is up, allow it to naturally release pressure for another 10 minutes before venting any remaining steam. Transfer the chicken to a tray and let it cool enough to handle.
- Season and Set Up Your Breading Station: While the chicken cools, mix the poultry seasoning, salt, and pepper in a small bowl and rub it generously all over each piece. Get your breading line ready with three bowls (or resealable bags):
- One for 1 cup of flour mixed with garlic powder, onion powder, paprika, and red pepper.
- One for the egg and ½ cup buttermilk, whisked together.
- One for the remaining plain flour.
- Bread the Chicken: Start by dredging the chicken in the seasoned flour, making sure it's fully coated. Dip into the buttermilk-egg wash, then coat again in the plain flour. You’ll want a thick, even layer of flour for that iconic crunchy crust.
- Time to Fry: Heat oil in a cast iron skillet over medium heat until it reaches 350°F. Gently place the coated chicken into the hot oil, skin side down, being careful not to overcrowd the pan. Work in batches if needed. Fry for 10–15 minutes per side, turning occasionally until the coating is deep golden and crisp. Internal temperature should hit 180°F for perfectly cooked chicken.
- Once fried, transfer the chicken to a paper towel-lined container to rest briefly before serving. It’ll stay warm while the rest finishes, and the towel helps soak up any extra oil.
Notes
- This chicken is best enjoyed hot, straight from the pan, with classic sides like mac and cheese, collard greens, or fluffy buttermilk biscuits.
- Storage: Leftovers can be refrigerated in an airtight container for up to 3 days. Reheat in the oven at 375°F to maintain the crispiness.
- Let me know if you'd like a printable recipe card or Pinterest-ready pin description next!
Nutrition Information
Yield
6Serving Size
1Amount Per Serving Calories 3700Total Fat 243gSaturated Fat 54gTrans Fat 0gUnsaturated Fat 162gCholesterol 942mgSodium 3540mgCarbohydrates 89gFiber 21gSugar 18gProtein 296g
All Chicken Recipes.com, occasionally offers nutritional information for recipes contained on this site. This information is provided as a courtesy and is an estimate only. This information comes from online calculators. Although allchickenrecipes.com attempts to provide accurate nutritional information, these figures are only estimates.
Try Other Recipes :